The Paper Airplane That Flies Forever
Make your own walkalong paper glider
/https://tf-cmsv2-smithsonianmag-media.s3.amazonaws.com/filer/76/ea/76ea8965-7277-49c5-89b5-431347bf1448/fliesforever-homepage.jpg)
We have it on good authority that one of the symptoms of Spring Fever is a desire to goof off and make paper airplanes. Succumb to the fever by grabbing a copy of How to Build a Hovercraft: Air Cannons, Magnet Motors, and 25 Other Amazing DIY Science Projects by Stephen Voltz and Fritz Grobe (Chronicle Books, 2013).
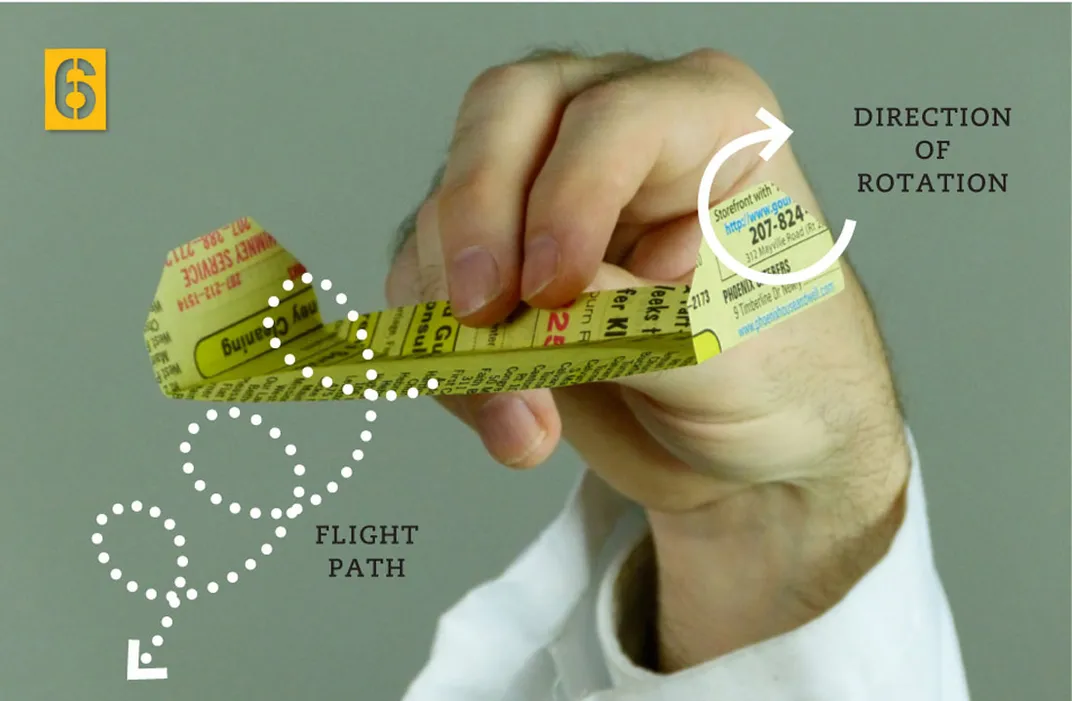
This paper airplane—the Tumblewing—is a type a walkalong glider. The authors note that it’s designed to fall steadily forward and down, in a spiral. If you walk too fast, the Tumblewing will fly over your shoulder; if you walk too slowly, it will fall to the ground. So flying it takes a bit of practice. Would Orville and Wilbur have headed back to the bicycle shack if their first attempt failed?!? No!
VERDICT: It took us a couple of practice sessions to get the hang of the Tumblewing. Our first attempt fizzled because we used the wrong size cardboard. (Also, our boss told us to get back to work.) With the correct size cardboard, it was much easier to keep the Tumblewing aloft, and keeping it in sustained flight was just a matter of practicing.
MATERIALS:
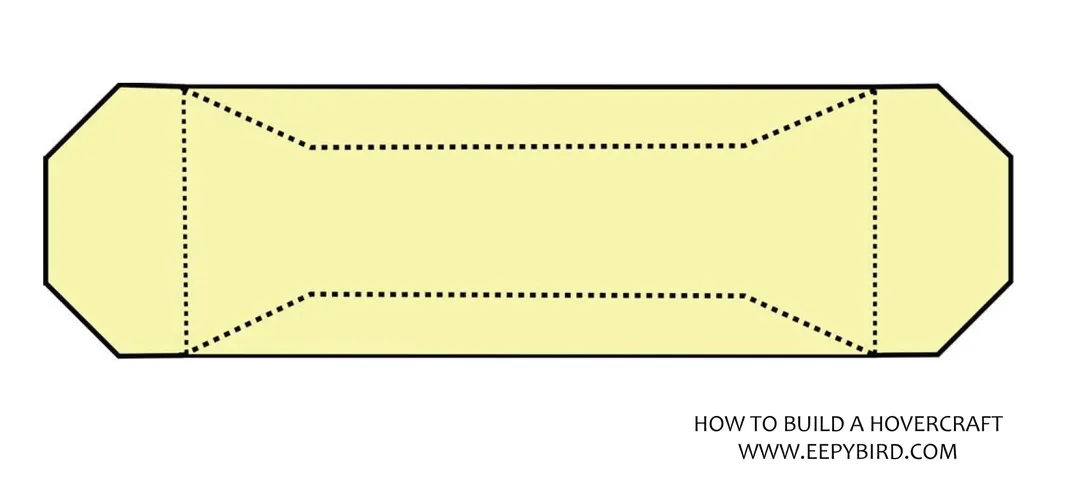
The glider pattern (shown below)
8 1⁄2" x 11" printer paper
Page from a phone book
Scotch tape
2' x 2' or larger piece of cardboard (at least as big as the top of a large pizza box)
TOOLS:
Scissors
Printer (if you’re downloading the digital image)
HOW TO BUILD IT:
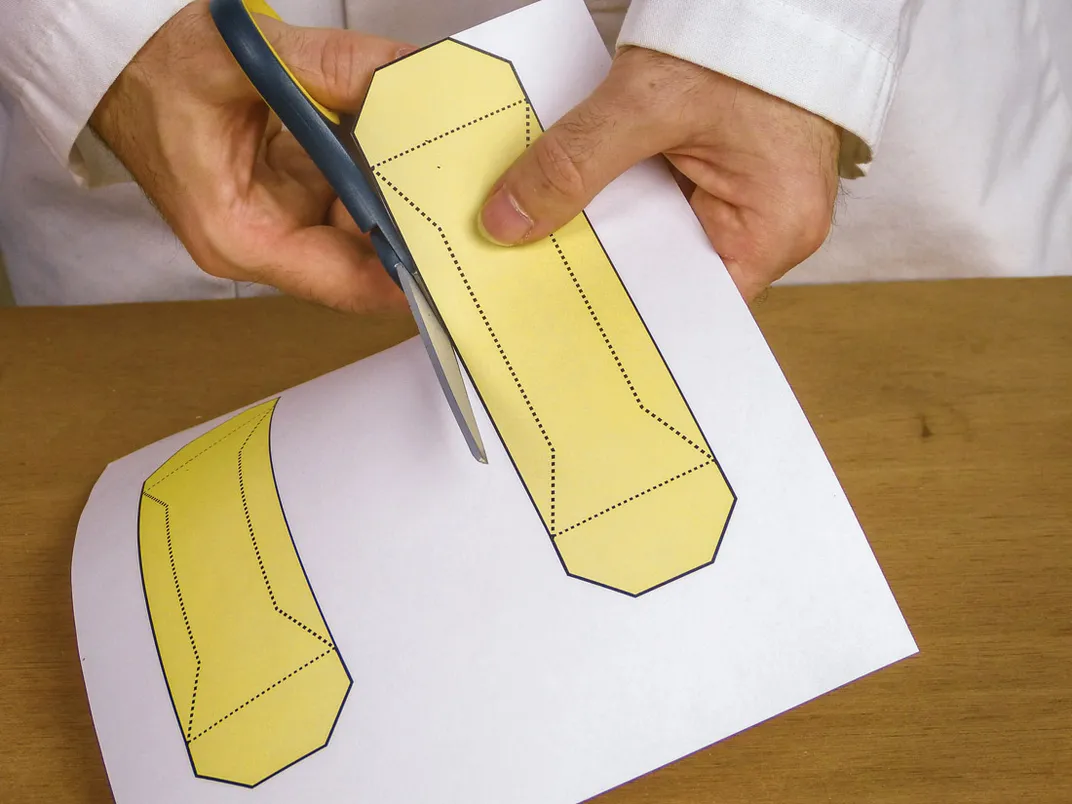
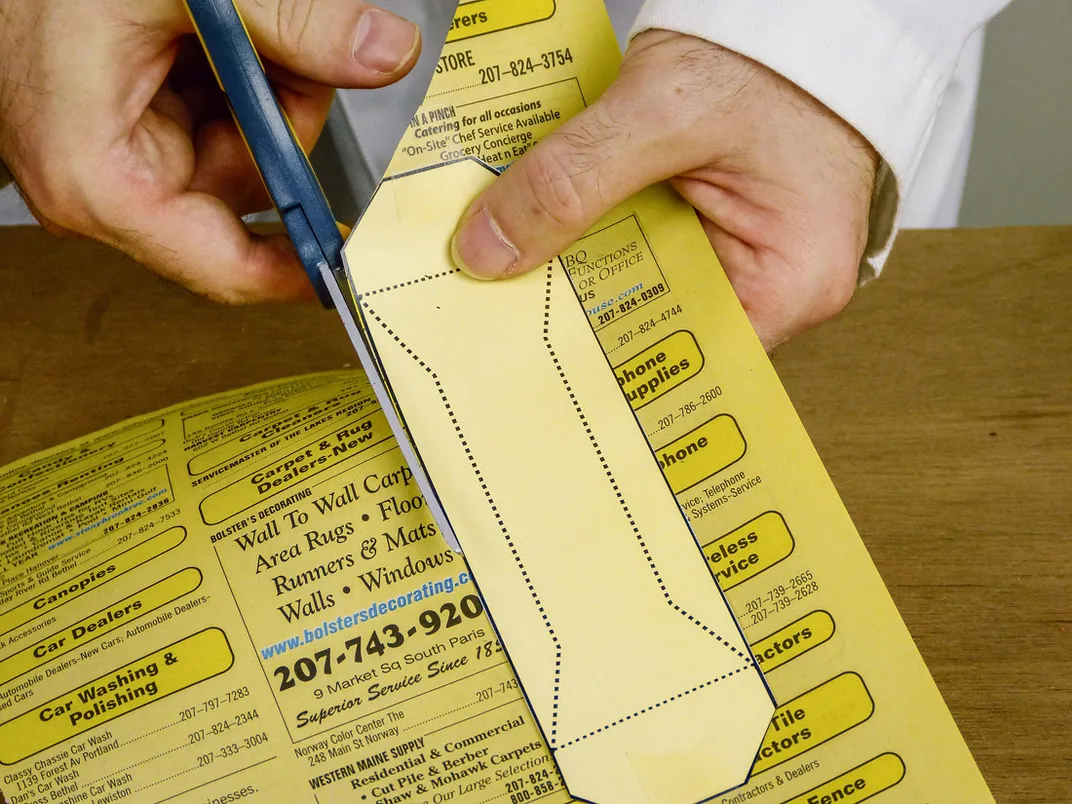
Using 2 small pieces of Scotch tape, tape the ends of the pattern to the phone book paper. Using scissors, cut around the pattern to get a rectangle of phone book paper with the corners cut off, but leave two little points where the tape attaches the pattern to the paper. You’ll cut off those points shortly, but for now, you want to keep the pattern and the phone book paper sandwiched together so you can fold them both together along the lines shown on the pattern.
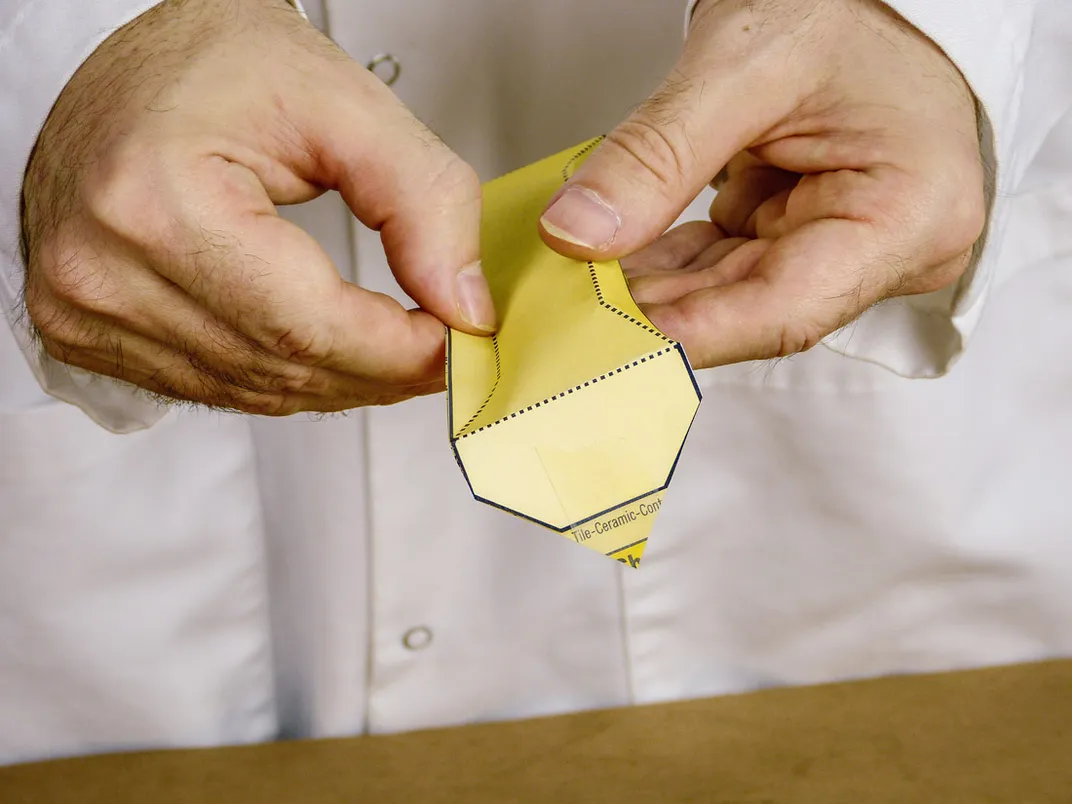
STEP THREE: Fold both ends up 90 degrees, about 1 1/2" in from the end (where the dotted lines are on the pattern).
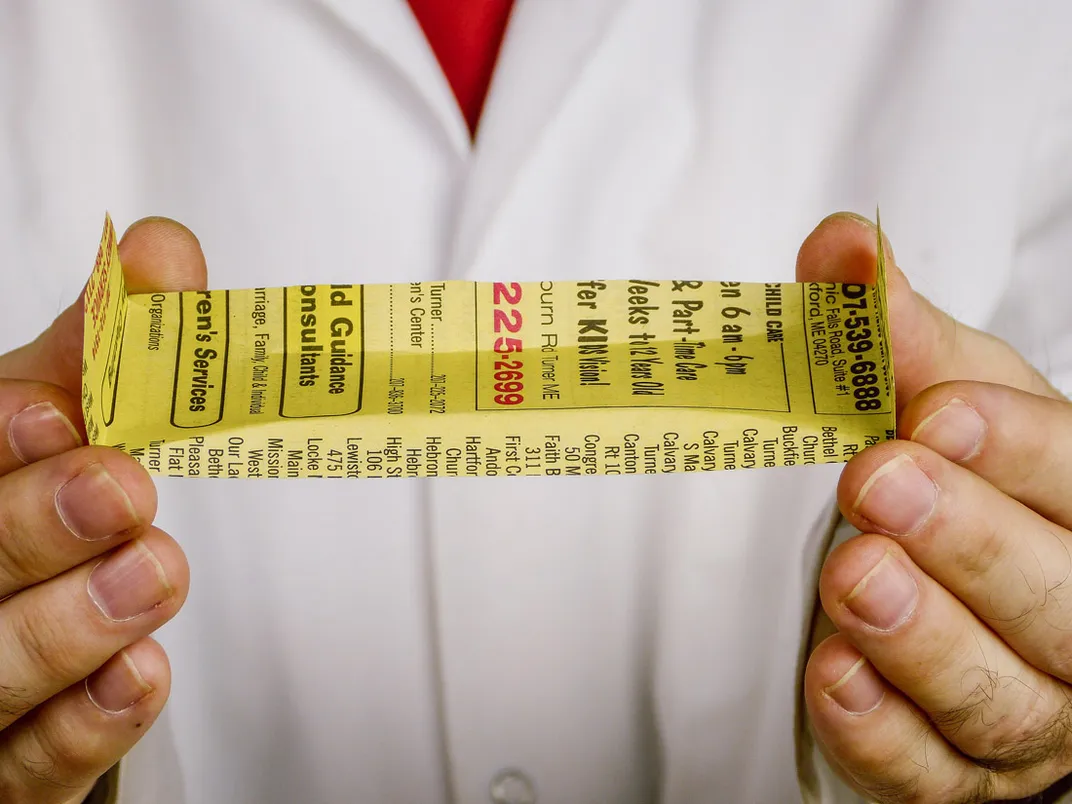

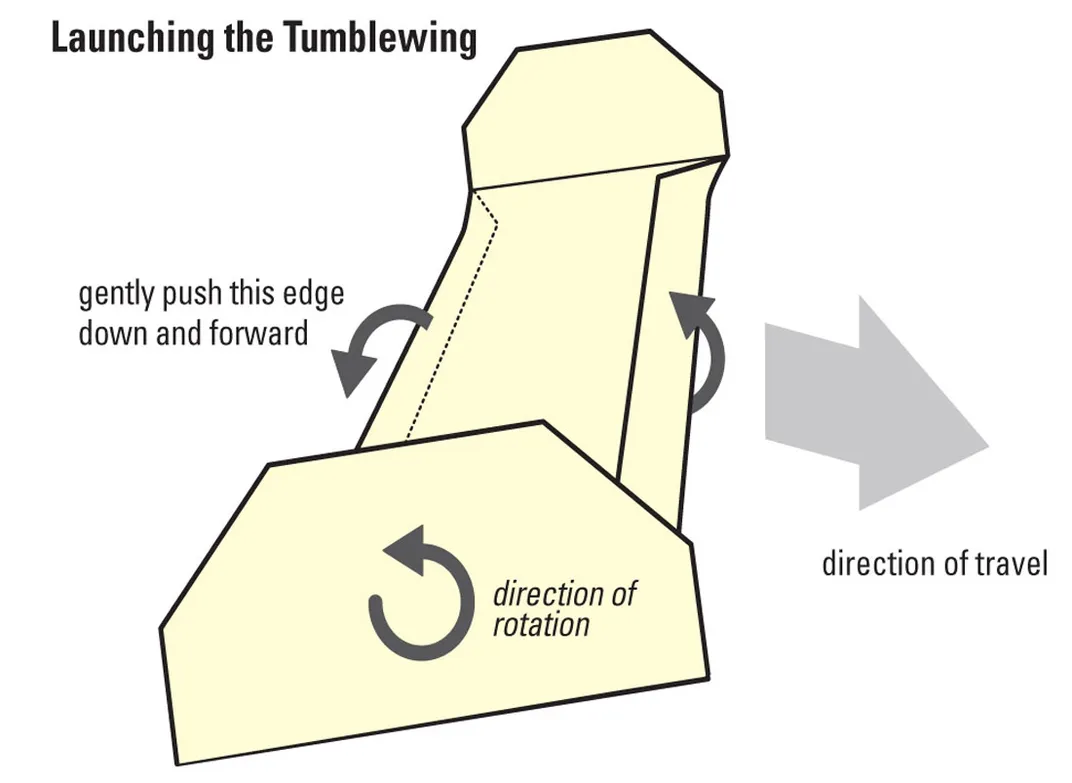
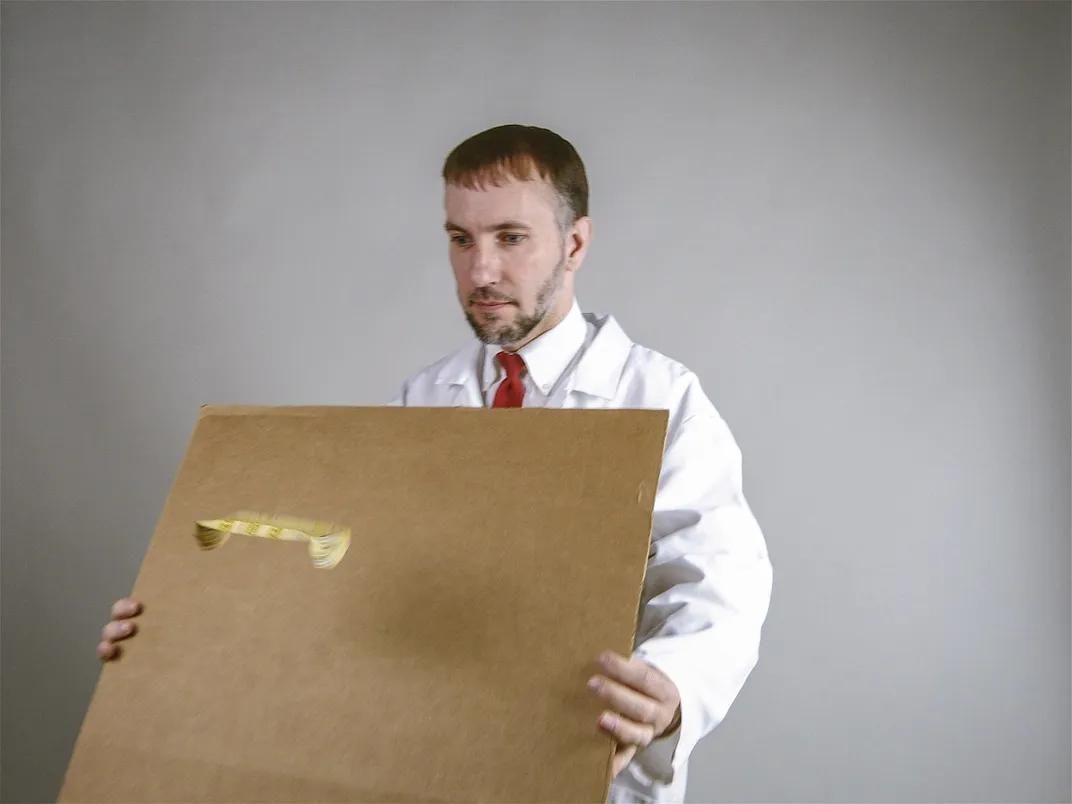
NOTE: It can take practice to get the hang of it. One common mistake is to give in to the temptation to tilt the cardboard at more of an angle to try to “lift” the glider from below. Don’t do it. The cardboard needs to be close to vertical to get the necessary slope lift. If your glider is dropping too fast, walk faster, don’t tilt the cardboard back. Also, if you find your Tumblewing turning on its own to one side or the other, check to make sure the ends are as straight and vertical as possible. If they angle in or out, they will make the plane veer to one side.
Text and images reproduced with the permission of Chronicle Books.